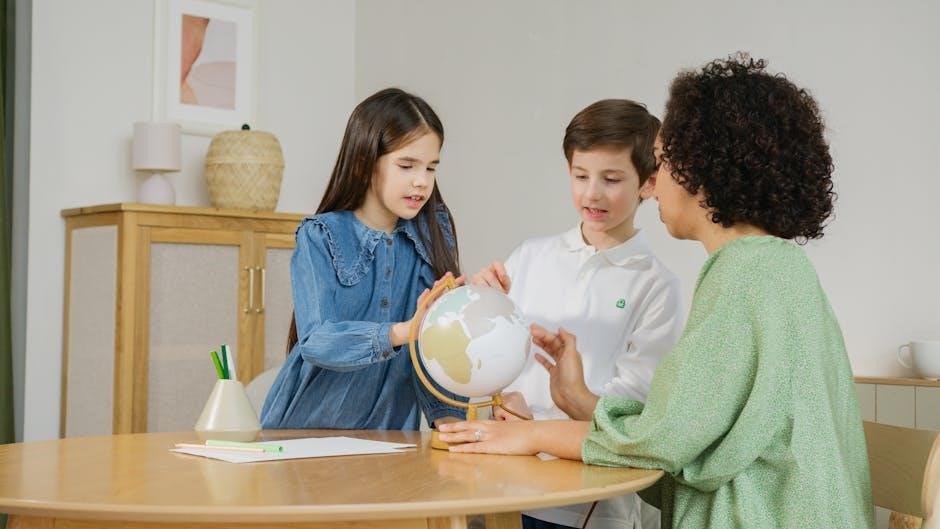
Colouring guides unlock creativity for all ages, offering relaxation and artistic expression through printable sheets and digital platforms․
These guides, available freely online, provide a joyful escape, sparking imagination with diverse themes – from mandalas to animals and beyond!
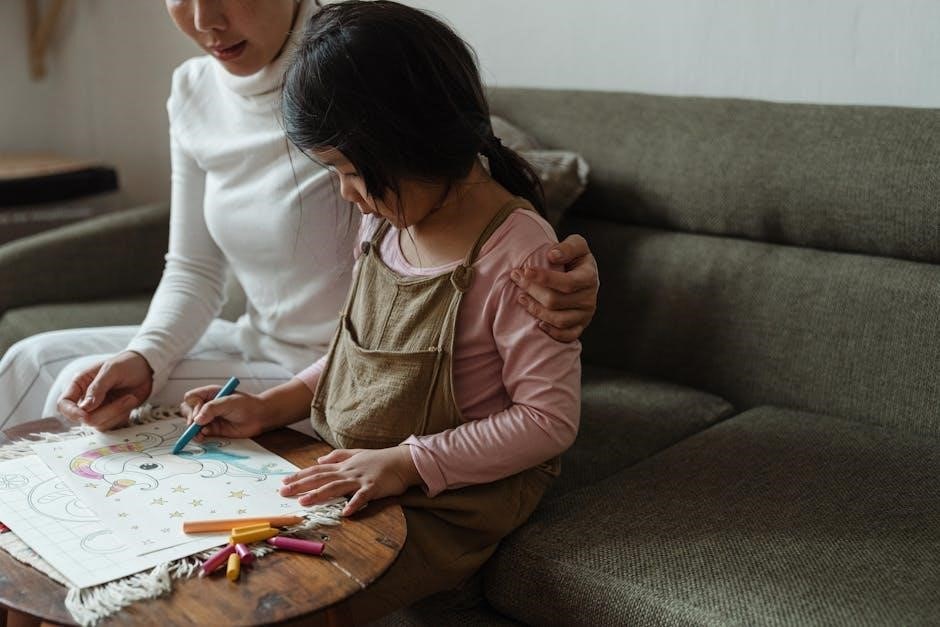
Adults rediscover the pleasure of mindful colouring, while children benefit from learning and fun, fostering creativity with every stroke․
What is a Colouring Guide?
A colouring guide is essentially a resource designed to assist individuals in the art of colouring, ranging from simple outlines to intricate designs․ These guides come in various forms, including printable pages readily available online, physical colouring books, and increasingly, digital platforms offering interactive colouring experiences․
They serve as a template, providing pre-drawn images or patterns that users then fill with colour using a variety of mediums – pencils, markers, paints, or digital tools․ The core purpose is to encourage creativity and relaxation, offering a mindful activity suitable for all ages and skill levels․
Whether it’s a seasonal scene, beloved character, or complex mandala, a colouring guide provides the structure, allowing the colourist to express their personal style and imagination․
Benefits of Using Colouring Guides
Utilizing colouring guides offers a wealth of benefits extending beyond simple entertainment․ For adults, colouring provides a therapeutic escape, reducing stress and anxiety through mindful focus․ It’s a fantastic way to disconnect from digital devices and reconnect with creative expression․
Children benefit from improved fine motor skills, hand-eye coordination, and colour recognition․ Colouring guides also foster creativity and imagination, encouraging self-expression and building confidence․
Furthermore, these guides are readily accessible and affordable, offering a low-cost hobby for families․ They promote quality time together and can even combine creativity with learning, exploring themes like history or nature․
Essential Colouring Tools
Colouring guides come alive with the right tools! Explore pencils, markers, watercolour options, and diverse paper types to enhance your artistic journey․
Types of Colouring Pencils
Colouring guides benefit greatly from understanding pencil varieties․ Wax-based pencils are affordable and blend easily, ideal for beginners, offering vibrant colour laydown․
Oil-based pencils provide richer, more consistent colour and are excellent for layering and detail work, resisting wax bloom over time․
Polymer pencils combine the best of both worlds – smooth application like wax, with the durability and blendability of oil-based options․
Hardness also varies; softer pencils (B) create darker marks and blend readily, while harder pencils (H) hold a point longer for fine lines․
Water-soluble pencils, when activated with water, mimic watercolour paints, adding another dimension to your colouring projects within the guide․
Markers for Colouring
Colouring guides open up exciting possibilities with markers! Alcohol-based markers, like Copics, are favoured for their blendability and vibrant, translucent colours, perfect for smooth gradients․
Water-based markers offer a more affordable option, suitable for beginners, though they may not blend as seamlessly as alcohol-based varieties․
Brush markers feature a flexible tip, allowing for varying line widths – ideal for calligraphy and expressive colouring within detailed designs․
Chisel-tipped markers provide broad coverage, excellent for filling large areas quickly and efficiently in your chosen guide․
Consider marker paper to prevent bleed-through, ensuring your artwork remains pristine and vibrant, enhancing the overall colouring experience․
Watercolour Pencils and Paints
Colouring guides benefit greatly from the unique effects of watercolour mediums․ Watercolour pencils offer control, allowing for detailed work before activating the colour with water․
They blend beautifully, creating soft washes and subtle gradients, perfect for delicate floral or landscape designs within your chosen guide․
Traditional watercolour paints provide even greater versatility, enabling layering and blending for rich, luminous effects․
Watercolour paper is essential, as it’s designed to withstand water without buckling or tearing, preserving your artwork․
Experiment with different brush sizes and techniques to achieve varied textures and depths, elevating your colouring to an artistic level․
Paper Choices for Different Media
Colouring guides demand careful paper selection to maximize your chosen medium’s potential․ For dry media like coloured pencils, a smooth, slightly textured paper prevents excessive wear and allows for layering․
Marker paper is crucial when using alcohol-based markers, as it resists bleeding and ghosting, ensuring vibrant, clean results within your colouring guide․
Watercolour paper, available in various weights and textures (hot press, cold press, rough), is essential for watercolour pencils and paints․
Heavier weights (140lb/300gsm) minimize buckling when wet․
Consider the paper’s colour too – bright white enhances colours, while cream adds warmth․ Choosing the right paper elevates your colouring experience!
Basic Colouring Techniques
Colouring guides benefit from foundational skills like layering, blending, hatching, and stippling․ These techniques build depth, texture, and visual interest in your artwork․
Mastering these basics unlocks creative potential!
Layering Colours
Layering colours is a fundamental technique in colouring guides, building richness and depth gradually․ Begin with light shades, applying gentle pressure with your chosen medium – pencils, markers, or paints․
Subsequent layers introduce progressively darker tones, intensifying the colour and creating subtle transitions․ This method allows for greater control than applying heavy colour immediately․
Experiment with different colour combinations within layers; for example, a base of yellow followed by orange and then red will create a vibrant, warm effect․ Remember to blend lightly between layers to avoid harsh lines․
Building up colour slowly allows for corrections and adjustments, resulting in a more polished and nuanced final piece․ It’s a cornerstone of achieving realistic and visually appealing results․
Blending Techniques
Blending techniques are crucial for smooth transitions and realistic effects within colouring guides․ Several methods exist, depending on your medium․
For coloured pencils, use a blending stump or tortillon to gently smudge and soften the pigment, creating seamless gradients․ Circular motions work best․ With markers, quick blending before the ink dries is key – use a colourless blender or a lighter shade of the same colour․
Watercolour paints naturally blend, but controlling the water-to-pigment ratio is vital․ Wet-on-wet blending creates soft washes, while wet-on-dry offers more defined edges․
Practice is essential to master blending, achieving a professional look and enhancing the overall visual harmony of your artwork․ Experiment to find what works best for you!
Hatching and Cross-Hatching
Hatching and cross-hatching are foundational techniques in colouring guides for creating value and texture․ Hatching involves drawing parallel lines to represent shading; closer lines indicate darker areas, while spaced lines suggest lightness․
Cross-hatching builds upon this by layering lines at different angles․ This intersection of lines creates a denser, richer tone and adds visual interest․ The more layers, the darker the value becomes․
These techniques are particularly effective with pens, pencils, and even markers, offering control and depth․ Varying line weight and density further enhances the effect, simulating form and light․
Mastering hatching and cross-hatching allows for detailed shading and realistic rendering within your colouring projects, adding dimension and artistry․
Stippling for Texture
Stippling, a unique technique within colouring guides, utilizes dots to create shading and texture․ The density of dots dictates the value – more dots equal darker areas, fewer dots create lighter tones․ It’s a patient, yet rewarding method․
This technique excels at mimicking granular surfaces like skin, fur, or stone․ Varying the size of the dots adds further nuance and realism․ Smaller, tightly packed dots create smoother transitions, while larger, scattered dots offer a rougher texture․
Stippling works beautifully with pens, fine-liners, and even coloured pencils․ It demands precision but yields stunning, detailed results, adding a distinctive artistic flair to your artwork․
Experiment with dot patterns and spacing to achieve diverse textural effects, elevating your colouring beyond simple flat tones․
Advanced Colouring Techniques
Advanced techniques elevate colouring beyond basics, exploring colour theory, depth creation, highlights, shadows, and detailed tutorials like hair colouring for realism․

Colour Theory Basics
Colour theory is fundamental to impactful colouring․ Understanding the colour wheel – primary (red, yellow, blue), secondary (green, orange, purple), and tertiary colours – unlocks harmonious palettes․
Complementary colours (opposite on the wheel, like red and green) create vibrant contrast, while analogous colours (adjacent, like blue and green) offer a soothing, blended effect․
Monochromatic schemes use variations of a single hue for subtle elegance․ Experimenting with colour temperature – warm (reds, yellows) versus cool (blues, greens) – influences mood and depth․
Consider colour value (lightness/darkness) and saturation (intensity) to achieve desired effects․ Applying these principles transforms flat colouring into dynamic, visually engaging artwork, enhancing realism and artistic expression․
Creating Depth and Dimension
Depth and dimension in colouring are achieved through strategic shading and layering․ Begin with light base layers, gradually building up darker tones to suggest form and volume․
Consider the light source – where is it coming from? – and apply shadows accordingly․ Utilize blending techniques to smooth transitions between colours, avoiding harsh lines․
Layering multiple shades of the same hue creates subtle variations, mimicking realistic light interaction․ Employ darker values in recesses and lighter values on protruding surfaces․
Adding highlights – the brightest points – emphasizes form and catches the eye․ Mastering these techniques transforms flat images into three-dimensional artwork, enhancing visual impact and realism․
Using Highlights and Shadows
Highlights and shadows are crucial for creating realistic and visually appealing coloured artwork․ Shadows define form, indicating where light is blocked, while highlights reveal surfaces facing the light source․
Start by establishing a clear light source; this dictates the placement of both․ Use darker shades for shadows, layering gradually to build intensity․ Blend these shadows smoothly for a natural look․
Highlights should be the brightest points, often using the purest form of a colour or even white․ Apply them strategically to edges and curves to emphasize shape․
Experiment with different shadow and highlight intensities to achieve varying effects, from subtle depth to dramatic contrast․ Mastering this technique elevates colouring from flat to dimensional․
Colouring Hair — A Tutorial
Colouring hair requires a layered approach for realistic results․ Begin by sketching the head shape and defining the hair’s flow with comb lines․ Establish a base colour, applying it evenly across the hair․
Next, add depth with darker shades, focusing on areas away from the light source․ Blend these shades seamlessly to avoid harsh lines․ Introduce highlights using lighter tones, concentrating on areas where light naturally hits․
Vary the highlight and shadow intensity to create dimension and texture․ Consider adding subtle colour variations within the hair for a more natural look․
Refine details, adding stray hairs and adjusting colour saturation for a polished finish․ Practice makes perfect – experiment with different techniques!
Colouring Themes and Styles
Colouring themes range widely, including captivating mandalas, adorable animals, delicate florals, and precise geometric designs, offering diverse artistic explorations for every preference․
Mandala Colouring
Mandala colouring offers a deeply meditative and relaxing experience, rooted in ancient spiritual traditions․ These circular designs, radiating from a central point, symbolize wholeness and harmony․
The repetitive patterns within mandalas encourage focus and mindfulness, allowing colourists to quiet their minds and reduce stress․
When approaching a mandala, consider using a variety of colours to represent different aspects of yourself or your intentions․ Layering colours and experimenting with blending techniques can create stunning visual effects․
From simple, beginner-friendly mandalas to intricate, complex designs, there’s a mandala to suit every skill level․ Explore different colour palettes – vibrant and bold, or soft and pastel – to express your unique creativity․
Many free printable mandala pages are readily available online, making this a wonderfully accessible art form․
Animal Colouring
Animal colouring pages are a perennial favourite, appealing to both children and adults alike! From majestic lions and playful dolphins to whimsical birds and cuddly kittens, the possibilities are endless․
When colouring animals, consider their natural habitats and colouration for a realistic approach․ However, don’t be afraid to embrace fantasy and create uniquely coloured creatures!
Experiment with different textures to represent fur, scales, or feathers․ Layering colours and using blending techniques can add depth and dimension to your artwork․
Animal colouring provides a fantastic opportunity to learn about different species and their characteristics․ It’s a fun and engaging way to combine creativity with education․
Numerous free printable animal colouring pages are available online, catering to all ages and skill levels – a truly wild and wonderful experience!
Floral Colouring
Floral colouring offers a serene and beautiful escape, allowing artists to explore delicate petals, intricate leaves, and vibrant blooms․ It’s a popular choice for relaxation and mindful creativity․
Consider using a variety of colour palettes – from soft pastels for a romantic feel to bold, contrasting hues for a more dramatic effect․ Layering colours is key to achieving realistic depth and dimension in floral designs․
Experiment with different techniques like blending and stippling to create texture and highlight the unique characteristics of each flower․ Don’t be afraid to add your own artistic flair!
Floral patterns range from simple daisies to complex roses, offering options for all skill levels․ Printable floral colouring pages are readily available online, providing endless inspiration․
Embrace the beauty of nature and let your creativity blossom with the calming and rewarding art of floral colouring!
Geometric Colouring
Geometric colouring provides a unique and satisfying artistic experience, focusing on precise lines, symmetrical patterns, and mathematical forms․ It’s a fantastic way to practice focus and attention to detail․
Explore the use of repeating motifs, tessellations, and intricate designs․ Consider employing colour gradients or contrasting shades to emphasize the shapes and create visual interest․
Geometric patterns often lend themselves well to bold colour choices, but subtle palettes can also create a sophisticated and calming effect․ Experiment with different combinations!
Many free printable geometric colouring pages are available online, ranging from simple shapes to complex mandalas and kaleidoscopic designs․
This style encourages precision and offers a meditative quality, making it a rewarding activity for both beginners and experienced colourists․
Digital Colouring Guides
Digital colouring utilizes software and tools for artistic expression, offering layers, brushes, and textures․ It provides flexibility and control for vibrant, detailed artwork!
Software Options for Digital Colouring
A diverse range of software caters to digital colouring enthusiasts, from beginner-friendly to professional-grade options․ Popular choices include Adobe Photoshop, renowned for its robust features and layering capabilities, allowing intricate detail and complex effects․
Procreate, available on iPad, offers a streamlined interface and intuitive tools, ideal for on-the-go creativity․ Clip Studio Paint is favoured by illustrators and comic artists, boasting specialized brushes and perspective rulers․
For simpler projects, free options like Krita and Autodesk Sketchbook provide essential tools without a hefty price tag․ Each program offers unique strengths, enabling artists to explore various styles and techniques, ultimately enhancing their digital colouring journey․
Using Layers in Digital Colouring
Layers are fundamental to digital colouring, offering unparalleled control and flexibility․ Think of them as transparent sheets stacked on top of each other, each holding a different element of your artwork – sketches, line art, base colours, shadows, and highlights․
This non-destructive workflow allows you to edit individual components without affecting others․ For example, adjust the colour of shadows on one layer without altering the base colour below․
Experiment with blending modes (multiply, overlay, screen) on separate layers to achieve unique effects․ Utilizing layers streamlines corrections, experimentation, and complex rendering, making digital colouring a dynamic and forgiving process․
Digital Brushes and Textures
Digital art software boasts a vast library of brushes, mimicking traditional media and offering unique effects․ Explore brushes simulating pencils, markers, watercolour, and even textured surfaces like canvas or paper․
Experiment with brush settings – size, opacity, flow, and shape – to customize your strokes․ Textures add depth and realism; overlaying texture brushes onto colour layers creates subtle surface details․
Download custom brushes created by other artists to expand your toolkit․ Don’t be afraid to blend brushes and textures for innovative results․ Mastering digital brushes unlocks a world of artistic possibilities, enhancing your digital colouring experience․

Resources for Colouring Guides
Numerous online platforms offer printable pages and books for adults and children․ Websites and videos provide tutorials, inspiring creativity and skill development!
Online Printable Colouring Pages
The internet is brimming with a vast collection of free, printable colouring pages, catering to every interest and skill level․ From historical scenes and mythological creatures to adorable animals, vibrant holidays, and relatable everyday life depictions, there’s something for everyone․
Websites like Coloring Only and Coloring Hub offer extensive libraries, often in formats like PDF, JPG, and PNG, allowing for easy download and printing․ These resources are perfect for quick activities, classroom use, or simply a relaxing hobby․
Many sites also categorize pages by theme, making it simple to find exactly what you’re looking for․ Explore seasonal options, character favourites, or delve into intricate mandala designs – the possibilities are truly endless, and best of all, they’re readily accessible and completely free!
Colouring Books for Adults
Colouring books designed specifically for adults have surged in popularity, offering a therapeutic and creative outlet․ These aren’t your childhood colouring books; they feature intricate designs, complex patterns, and sophisticated themes like mandalas, florals, and abstract art․
Brands like Johanna Basford’s “Secret Garden” and “Enchanted Forest” pioneered this trend, captivating audiences with their detailed illustrations․ Adult colouring books provide a mindful escape from daily stress, promoting relaxation and focus․
Beyond the calming benefits, they encourage artistic expression and allow individuals to reconnect with their inner child․ Available in a wide range of styles and price points, these books are a fantastic way to explore creativity and unwind․
Tutorial Websites and Videos
Numerous online resources offer invaluable guidance for aspiring colourists, ranging from beginner-friendly tutorials to advanced techniques․ Websites and video platforms like YouTube host a wealth of content demonstrating layering, blending, and shading methods․
Specifically, tutorials focusing on hair colouring provide step-by-step instructions, covering base colours, highlights, and shadow placement․ These resources often delve into colour theory, explaining how to create depth and dimension within your artwork․
Many channels showcase different media – pencils, markers, and watercolours – and offer tips for troubleshooting common issues like bleeding or fixing mistakes․ Exploring these tutorials unlocks new skills and elevates your colouring experience․
Troubleshooting Common Colouring Issues
Addressing challenges like bleeding or mistakes is key! Utilize techniques to prevent smudging and learn effective methods for correcting errors during the colouring process․
Preventing Bleeding
Bleeding, where colours run beyond the lines, can frustrate any colourist․ Fortunately, several strategies exist to minimize this issue․ Paper choice is paramount; thicker paper stock, specifically designed for colouring, resists ink penetration far better than standard printer paper․
When using water-based markers or watercolour pencils, applying colours in lighter layers and allowing each layer to dry completely before adding another significantly reduces bleeding․ Avoid over-saturating the paper with liquid mediums․
For alcohol-based markers, using a barrier layer underneath your work, like a piece of cardstock or a dedicated marker pad, is crucial․ Testing your markers on a scrap piece of paper beforehand can also reveal potential bleeding tendencies․ Consider using colourless blender markers to soften edges without causing excessive spreading․
Fixing Colouring Mistakes
Even experienced colourists make mistakes! Don’t despair – several techniques can salvage your artwork․ For pencil colours, a kneaded eraser gently lifts colour without damaging the paper’s surface․ Layering a lighter colour over the mistake can often diminish its visibility․
With markers, correcting errors is trickier․ A white gel pen can carefully cover small mistakes, but use sparingly as it can appear opaque․ Blending with a similar shade can sometimes camouflage the error, though results vary․
For watercolour, a clean, damp brush can lift some of the colour before it fully dries․ Embrace imperfections! Sometimes, a “mistake” can lead to a unique and beautiful effect, adding character to your colouring․