Welcome to the bread slicer manual! This guide provides essential information for safe and effective use of your bread slicer, ensuring optimal performance and longevity of the appliance.
Understanding the Basics of a Bread Slicer
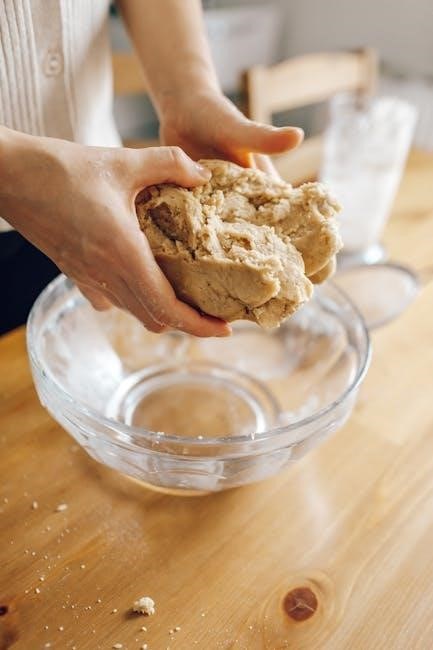
A bread slicer is a kitchen appliance designed to cut bread into uniform slices efficiently and safely. Available in manual, automatic, or specialty models, it offers precise control over slice thickness, ranging from 8-24mm. Key features include a cutting blade, adjustable guides, and a pusher for secure bread placement. Manual slicers are compact and cost-effective, while automatic models use motors for faster operation. Safety elements like blade guards and secure locking mechanisms prevent accidents. Proper alignment and even pressure ensure consistent results. Regular maintenance, such as cleaning and blade sharpening, is essential for optimal performance. Always refer to the manual for specific instructions tailored to your slicer type. Understanding these basics ensures you make the most of your bread slicer while maintaining safety and durability.
Importance of Using a Bread Slicer
Using a bread slicer is essential for achieving evenly cut slices, which is crucial for making uniform sandwiches, toast, or crustless bread. It saves time and effort compared to cutting bread manually with a knife, reducing the risk of uneven or wasted slices. A bread slicer ensures consistency, especially in commercial or high-volume settings, where precise portion control is vital. Additionally, it enhances safety by minimizing direct contact with sharp blades. For home users, it simplifies meal preparation and adds professionalism to homemade dishes. Moreover, a slicer accommodates various bread types, from soft loaves to crusty sourdough, and allows for adjustable thickness to suit different preferences. By investing in a bread slicer, you streamline your workflow, improve efficiency, and elevate the quality of your bread-related tasks, making it a valuable tool for both home and professional kitchens.

Choosing the Right Bread Slicer for Your Needs
Selecting the appropriate bread slicer involves considering factors such as usage frequency, bread type, and available space. Manual slicers are ideal for home use, offering simplicity and affordability, while automatic models suit high-volume settings like bakeries or restaurants. Specialty slicers cater to specific needs, such as adjustable thickness or handling crusty bread. Assess the size of the slicer to ensure it fits your workspace and accommodates typical loaf sizes. Features like adjustable slice thickness, safety mechanisms, and ease of cleaning should also be evaluated. Reading reviews and comparing models can help identify the best fit for your requirements. By prioritizing your needs, you can choose a slicer that enhances efficiency and delivers consistent results, whether for personal use or commercial applications.
Types of Bread Slicers

Bread slicers come in manual, automatic, and specialty models, each designed to meet specific needs and preferences, ensuring precise and efficient slicing for various bread types, satisfying user requirements.
Manual Bread Slicers
Manual bread slicers are a popular choice for home and small-scale use, offering simplicity and control over the slicing process. These slicers typically feature a sturdy design with a cutting blade and a chute for guiding the bread. Models like the Zassenhaus Classic Manual Bread Slicer are renowned for their durability and precision, making them ideal for slicing crusty sourdough or soft loaves. Many manual slicers come with adjustable thickness settings, allowing users to customize their slices for sandwiches, toast, or other recipes. They are often more affordable than automatic slicers and require no electricity, making them portable and energy-efficient. Safety features, such as secure blade locks and crumb trays, are common in modern designs. Cleaning is usually straightforward, with removable parts that simplify maintenance. For those seeking a reliable, cost-effective solution, manual bread slicers are a practical and versatile option.
Automatic Bread Slicers
Automatic bread slicers offer convenience and efficiency, especially for high-volume use. These slicers are powered by electric motors, allowing for quick and consistent slicing with minimal effort. They often feature adjustable slice thickness, varying from 8-24mm, and some models include advanced safety features like blade stop mechanisms. Automatic slicers are ideal for commercial settings or households needing frequent slicing. They typically include a bread chute and pusher for easy operation, and some come with conveyor belts for continuous slicing. Maintenance is straightforward, with many models offering removable parts for cleaning. However, they are generally more expensive than manual slicers and require proper setup and calibration for optimal performance. Always ensure the machine is used according to the manufacturer’s instructions to guarantee safety and effectiveness. Regular lubrication of moving parts and blade sharpening can extend the slicer’s lifespan and maintain cutting efficiency.
Specialty Bread Slicers
Specialty bread slicers are designed for specific needs, offering unique features that cater to particular types of bread or slicing requirements. These slicers often include adjustable thickness settings, allowing for precise control over slice size, and may feature materials like bamboo or stainless steel for durability and aesthetics. Some models are tailored for crusty or sourdough bread, ensuring clean cuts without tearing. Others may include crumb trays for neater operation or ergonomic designs for comfort during extended use. Specialty slicers are ideal for enthusiasts or professionals seeking customized slicing solutions. They may also offer advanced safety features, such as blade guards or automatic shut-off, to enhance user protection. When choosing a specialty slicer, consider the type of bread you work with most frequently and the specific features that align with your needs. Proper maintenance, such as regular cleaning and blade sharpening, will ensure long-term performance and satisfaction.

Safety Precautions
Always use care when near cutting blades. Keep the working area clean and avoid loose clothing. Use pushers or guides to maintain control and ensure safe operation.
General Safety Guidelines
Always read the manual thoroughly before using the bread slicer to understand its operation and safety features. Ensure the slicer is placed on a stable, flat surface to prevent accidents. Keep loose clothing and long hair tied back to avoid entanglement with moving parts. Never operate the slicer near children or pets. Use the provided pusher or guides to maintain control of the bread and avoid direct contact with the blades. Avoid overloading the slicer, as this can lead to uneven slicing or blade jamming. Keep fingers away from the cutting area at all times. If the slicer is electrical, unplug it when not in use or during cleaning. Regularly inspect the appliance for wear and tear, addressing any issues promptly to ensure safe operation. Adhering to these guidelines will help prevent injuries and extend the lifespan of your bread slicer.
Handling Cutting Blades Safely
Handling the cutting blades of your bread slicer requires extreme caution to prevent injuries. Always wear protective gloves when touching or cleaning the blades. Never reach into the slicing area while the machine is in operation. If the slicer is manual, ensure the blade is securely locked when not in use. For automatic models, avoid placing your fingers near the moving blade during operation. When cleaning, use a soft brush or damp cloth to avoid direct contact with the sharp edges. Store the slicer in a secure location out of reach of children. Regularly inspect the blades for dullness or damage, as dull blades can cause uneven slicing and increase the risk of accidents. Proper handling and maintenance of the blades will ensure safe and efficient slicing for years to come.
Emergency Procedures
In case of an emergency, such as a blade accident or equipment malfunction, follow these steps to ensure safety. First, immediately turn off the power switch and unplug the slicer if it is an electric model. For manual slicers, stop the slicing process and secure the blade. If a blade-related injury occurs, apply pressure to the wound and seek medical attention promptly. Do not attempt to operate the slicer until the issue is resolved. If the motor overheats or smells of burning, disconnect the power and allow it to cool before inspection. Never use a damaged or malfunctioning slicer, as this can lead to further incidents. Always refer to the manual for specific emergency instructions tailored to your bread slicer model. Regular maintenance and proper handling can help prevent emergencies and ensure safe operation.

Operating the Bread Slicer

Always use care when working near cutting knives. Stand in front of the machine, grasp the lever, and guide the bread through the slicer safely and evenly.
Step-by-Step Slicing Process
Begin by ensuring the bread slicer is placed on a stable, clean surface and plugged in if using an electric model. Adjust the slice thickness according to your preference using the provided controls.
Next, place the loaf of bread into the chute, aligning it with the guide rails. Use the pusher to gently hold the bread in position, ensuring your hands are clear of the blades.
Turn on the slicer and slowly move the pusher back and forth to guide the bread through the blades. For manual slicers, repeat this process for each slice until the loaf is fully sliced.
Once done, turn off the machine and allow it to cool before cleaning. Remove the sliced bread and store it properly. Always unplug the slicer after use.
This method ensures even, consistent slices while maintaining safety and efficiency.
Adjusting Slice Thickness
Adjusting the slice thickness on your bread slicer ensures you achieve the perfect thickness for your needs. For manual slicers, use the adjustment knob or lever located on the side of the machine. Turn it clockwise for thinner slices and counterclockwise for thicker slices.
For automatic models, the thickness is typically controlled via a dial or digital interface. Set the desired thickness, usually ranging from 8-22 mm, and the machine will maintain consistency.
Always ensure the bread is securely placed in the chute before adjusting. Thicker slices are ideal for hearty bread, while thinner slices are better for sandwiches or toast.
Remember to make small adjustments and test the slices before slicing an entire loaf. This feature allows customization, making your bread slicer versatile for various recipes and preferences.
Using the Bread Chute and Pusher
To ensure even slicing, place the bread loaf securely into the bread chute, aligning it with the guides. The chute is designed to hold the bread in position during slicing.
Use the pusher to apply gentle, consistent pressure on the bread as it moves through the slicer. This helps maintain control and prevents the bread from shifting.
Always keep your hands away from the cutting area while operating the slicer. The pusher serves as a safety feature, allowing you to guide the bread without risking injury.
After use, clean the chute and pusher thoroughly to remove crumbs and residue. Regular maintenance ensures optimal performance and prevents contamination.
Proper use of the bread chute and pusher is essential for achieving consistent, even slices and prolonging the lifespan of your bread slicer.

Maintenance and Cleaning
Regular maintenance ensures your bread slicer performs optimally. Clean the blades, chute, and pusher after each use to prevent crumbs buildup. Lubricate moving parts periodically.
Cleaning the Slicer After Use
Cleaning your bread slicer after each use is crucial for maintaining hygiene and ensuring optimal performance. Start by unplugging the slicer to avoid any accidental startups. Use a soft, damp cloth to wipe down the exterior, paying attention to any areas with visible crumbs or splatters. For the blades, use a gentle cleaning brush or a non-abrasive scrubber to remove any stuck particles. Avoid using harsh chemicals or abrasive cleaners, as they may damage the finish or dull the blades over time. The crumb tray should be removed and washed with warm, soapy water, then thoroughly dried before reattaching it. Regular cleaning prevents mold growth and keeps your slicer in excellent working condition. Always dry the slicer thoroughly after cleaning to prevent rust or corrosion. By following these steps, you can ensure your bread slicer remains safe, efficient, and ready for its next use;
Sharpening the Blades
Sharpening the blades of your bread slicer is essential for maintaining optimal performance and ensuring clean, even cuts. Dull blades can tear bread, leading to uneven slices and potential safety hazards. For manual slicers, use a sharpening stone or blade sharpener specifically designed for your blade type. Hold the stone at the recommended angle and gently draw it across the blade several times. For automatic slicers, check the manual for built-in sharpening features or follow the manufacturer’s instructions for professional sharpening. Sharpen blades regularly, ideally after every 50 uses, to maintain sharpness; Always unplug the slicer before sharpening and wear protective gloves to avoid injury. Proper blade maintenance ensures your slicer continues to deliver precise cuts and extends the lifespan of the appliance. Regular sharpening also prevents rust and keeps the blades functioning at their best.
Lubricating Moving Parts
Lubricating the moving parts of your bread slicer is crucial for ensuring smooth operation and preventing wear and tear. Regular lubrication helps maintain the efficiency and longevity of the appliance. Use a food-safe lubricant, such as silicone spray or mineral oil, to avoid contamination. Apply a small amount to the gears, hinges, and any other moving components. Avoid using cooking oils, as they may leave residue and attract dust. After lubricating, let the slicer sit for a few minutes to allow the oil to spread evenly. Wipe off any excess lubricant with a clean cloth to prevent drips. Lubricate every 100 uses or when you notice signs of friction or stiffness. Proper lubrication ensures your bread slicer runs quietly and efficiently, delivering consistent performance for years to come. Always refer to the manufacturer’s recommendations for specific lubrication guidelines.

Troubleshooting Common Issues
This section addresses common issues like uneven slices, blade jamming, and motor malfunctions. Regular cleaning, blade alignment, and lubrication can often resolve these problems quickly. Always refer to the manual for specific solutions.
Dealing with Uneven Slices
Uneven slices can occur due to improper blade alignment or incorrect slice thickness settings. To address this, ensure the blade is properly aligned and clean. Adjust the slice thickness to match the bread’s density and size. Place the bread evenly in the chute and use the pusher to maintain consistent pressure. If slices remain uneven, check for obstructions in the chute or blade dullness. Sharpening or replacing the blade may be necessary. Additionally, ensure the bread is cold, as warm bread can cause irregular slicing. Regularly cleaning and lubricating moving parts can also improve performance. Always refer to the manual for specific adjustment instructions to achieve uniform slices. Proper maintenance and alignment will help resolve uneven slicing issues effectively.
Resolving Blade Jamming
Blade jamming can occur due to improper bread alignment, excessive thickness, or debris accumulation. To resolve this, switch off the slicer and unplug it for safety. Inspect the blade and chute for obstructions like bread crumbs or uneven slices. Use a soft brush or cloth to clean the blade and chute thoroughly. Ensure the bread is properly aligned and placed in the chute before slicing. Avoid using overly thick slices, as this can strain the blade. If jamming persists, check the blade for dullness and sharpen or replace it as needed. Regularly lubricating moving parts can also prevent jams. Always refer to the manual for specific instructions on disassembling and cleaning the slicer safely. By following these steps, you can restore smooth operation and maintain optimal performance. Proper maintenance is key to preventing future blade jamming issues. Always prioritize safety when addressing blade-related problems.
Addressing Motor Issues
Motor issues can arise from overuse, improper maintenance, or electrical problems. If the motor stops during operation, switch it off immediately and unplug the slicer. Check for blockages like bread crumbs or debris in the chute or blade area. Ensure the bread is within the recommended thickness and size. Overloading the slicer can strain the motor, so always follow the manufacturer’s guidelines. If the motor overheats, allow it to cool down before resuming use. Regular lubrication of moving parts and proper cleaning can prevent motor strain. If issues persist, consult a professional or contact the manufacturer for assistance. Never attempt to repair the motor yourself, as this can cause further damage or safety hazards. Always refer to the manual for specific troubleshooting steps and maintenance recommendations to ensure the motor operates efficiently. By addressing motor issues promptly, you can extend the lifespan of your bread slicer. Proper care and adherence to guidelines are essential for maintaining optimal performance.
Final Tips for Optimal Use
To maximize your bread slicer’s performance, always store it in a dry place after cleaning. Use fresh, firm bread for consistent results and avoid overloading the chute. Regularly check and replace dull blades to maintain precision. For manual slicers, apply gentle, even pressure, while automatic models should be monitored to prevent jams. Keep the crumb tray clean to avoid messes and ensure smooth operation. Experiment with slice thickness settings to suit your recipes. Finally, refer to your manual for specific maintenance tips tailored to your model. By following these guidelines, you’ll enjoy perfectly sliced bread every time and extend the lifespan of your slicer.